
Okay, here’s the pattern for the Santa/Elf hat I made. If it
doesn’t make sense to you, there’s always the chance that I made a mistake in
typing it out, or that I even possibly just didn’t make myself clear enough. If
any questions arise, please feel free to contact me via the “Off the Hook”
facebook page and I will attempt to clarify or correct any mistakes.
Sincerely,
Stephen
Pattern note: I worked this pattern with two different
colors (OU team colors) alternating every single round between them. I’ve also
used this pattern to create a traditional Santa hat in solid red with a white
brim, and you could do that as well. Simply don’t switch colors and continue
doing each round in the same one.
To begin, with first
color chain 4 and then join in first chain with a slip stitch to form a ring. (an alternate method would be to work round
1 in a magic circle, but if that method isn’t familiar to you or it doesn’t make
sense to you, then this is the way I would recommend beginning)
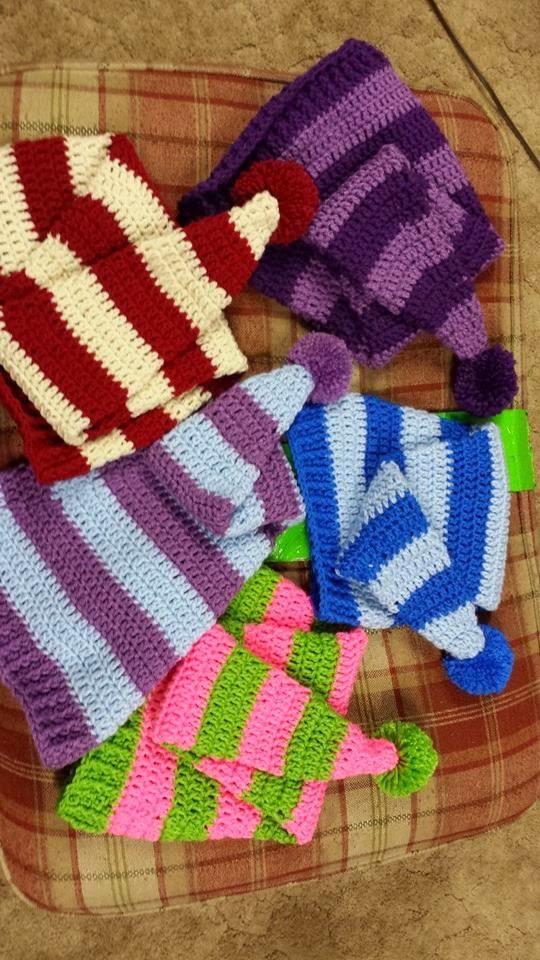
(Update: These hats are a variation on the pattern. They were done every two rows, then finished off and switching to a different color. Either way works,and make very nice patterns.)
Round 2: (Pick up
second color and drop the first but don’t finish off. Just let it hang and
begin working round 2 with the second color. This will create a series of small
loops on the inside of the hat, but this isn’t something to be concerned about
unless you’re an extreme perfectionist. In that case, you can feel free to
finish off each row and then go through the extra effort of working in over 60
loose ends for one single hat. I prefer the drop and switch method but you
wouldn’t have to do it that way if you’re not comfortable with it.) Chain 2, 1 dc in next 2 dc, then 2 dc in
next dc, then 1 dc in next 2 dc, then 2 dc in next dc. Join with slip stitch to
beginning chain 2. (Should have 8 dc
plus original ch 2) (This probably sounds harder than it really is. The secret
to this pattern is that every row you’re adding 2 more dc to the hat, gradually
increasing its’ width row by row. These extra stitches should be on
approximately the opposite side of the hat every single row. Don’t get too
obsessed with perfectly lining up exactly which stitch is exactly in the middle
of each row, just eyeball it. This hat won’t require you to be a perfectionist.
Just make sure you’re adding 2 stiches every single row and you’re good.)
Round 3: (Drop second color, pick back up the
original one) Chain 2, 1 dc in next
3 dc, 2 dc in next dc, 1 dc in next 3 dc, 2 dc in last dc, join. (Should
have 10 dc plus original ch 2)
Rounds 4 through (approximately)
60: do the same thing you did for round 3, but keep adding 2 stitches to every
row. Keep going until your hat is the circumference you want it to be but make
sure your last round before the brim is the opposite color than what you want
the brim to be. At this point I would finish off with my last color and
continue making the brim with the other color. (You don’t want it to be too tight, but obviously too loose could be
bad news as well. My hat was 60 rounds to the brim but everyone crochets
differently so you may not have to do that many or you may have to do more or
less.)
The Brim
(Important: In order to do the brim, you will not be
increasing anymore.)
Row 1 of brim: chain
2, dc once in each dc all the way around the edge, join
Rows 2-4: chain 2, then
front post dc in next dc, *dc in next dc, front post dc in next dc* (repeat
from * to * all the way around, then join. Work all three rows this way, doing
ordinary dc on top of ordinary dc from previous round, and front post dc on top
of front post dc from previous round. This will create a ribbing for the brim.)
For the finishing touches, you can either single crochet on
the edge all the way around, or you can do a crab stitch edging, which is done
by single crocheting backwards from right to left as opposed to left to right.
Either way will turn out fine. Also, make a pom-pom for the top of the hat
using either the color of the brim or both colors together.
ur my uncle and u made that for sarah and i was there when u made that
ReplyDeletethanks ffor wanting wendys